Back in the days, the term braid referred to the simple 3 strand braid. This is the same braid most girls wore to school. But while the simple 3 strand braid is still popular among women, there are many other types of hair braids you should try.
Over the years, braids have evolved and developed. Nowadays, there are a ton of different types of hair braids. And they all depend on your mood, occasion, and other factors.
For example, the braid you wear to school is not the one you war to a wedding. Or the braid for a date is different than the one for the gym.
With that in mind, one thing we have over the past several years is versatility. Braids have become versatile, and thanks to the many options, there is one for almost every occasion. With that in mind, here are some of the most popular braids, and instructions on how to make them.
Chapter Overview
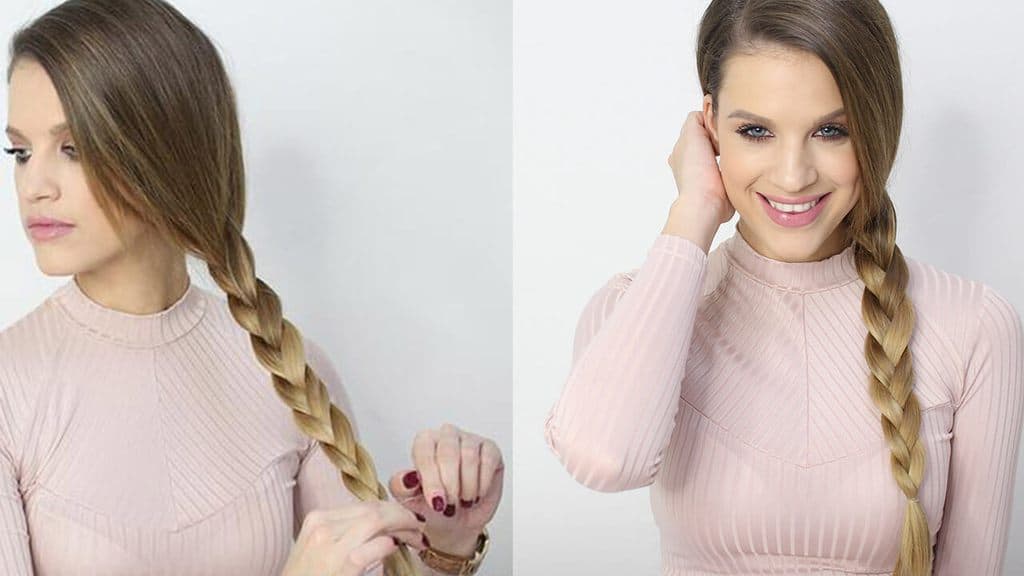
Simple 3 Strand Braid
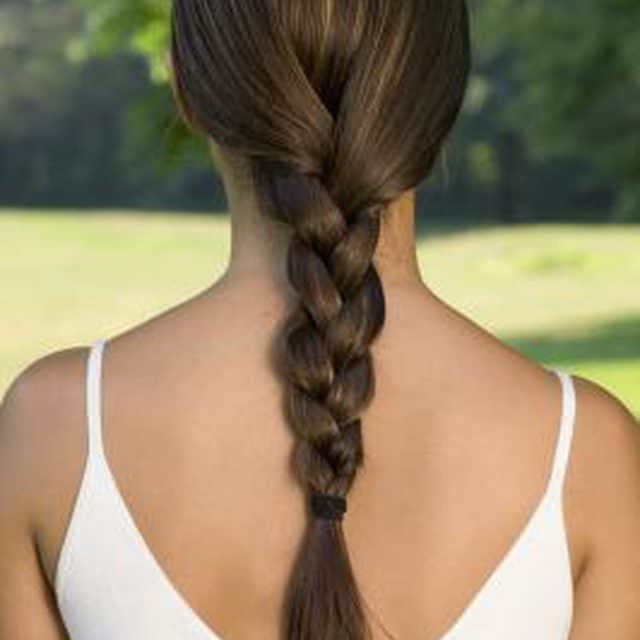
As mentioned, this is the most basic of all types of braids. It is a hairstyle every woman knows how to make, starting from her childhood years. And it is probably the first hairstyle any woman learns to make on her own.
However, let’s give you the instructions.
- Start by brushing all the knots and tangles to prepare your hair
- Divide the hair into three equal sections
- Flip the left section over the middle section, and then flip the right section over the middle section
- Repeat step three by alternately flipping left and right sections over the middle section until you have braided your hair
- Finish by securing the ends with a hair elastic
French braid
This classic has become extremely popular lately. It is a simple braid, but it is also urban and chic, and wonderful for hot summer days, casual daytime dates, and more. And you can also wear it for work.
It will take you a bit of practice to learn how to French braid your hair, but after a while, you can do it in a few minutes.
- Brush out all the knots and tangles and prepare your hair
- Pick up the front section of your hair, which is from between your temples, and divide it into 3 sections
- Simply braid the front section in a stitch
- Second, stitch onwards, and add a 2-inch section of hair from the outside of the braid to each of the side strands. Flip them over the middle strand of braid afterward
- Continue until you reach the nape of your neck, and there is no more hair to add to the braid. Braid the rest of the way down and secure with a hair elastic
- If you want to add some volume, loosen the braid
Dutch braid
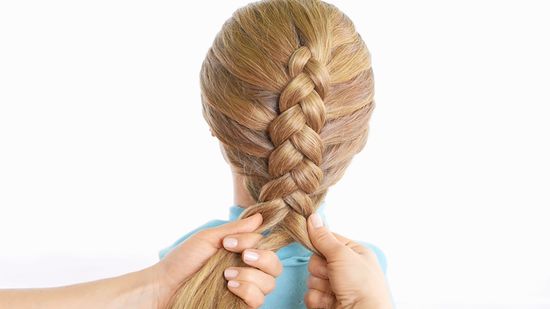
When you look at it, Dutch braid is basically a French braid done in reverse. These two are the most popular braids nowadays, and once you master them, you can do your own variations of types of hair braids.
You can mix and match Dutch and French with other hair type braids. You can style the Dutch braid into a bun for more fashionable choice.
- Once you brush all the knots and tangles in your hair, you are ready to go
- Start from between your temples and pick up the front section. Divide it into three sections
- Braid it for one stitch by flipping the side sections under the middle section, not over like in the French braid
- In each stitch of braid, add hair from the outside of the braid to the side sections, and then flip them under the middle section
- Braid the rest of the way down once you reach the nape of your neck. Secure your braid with a hair elastic
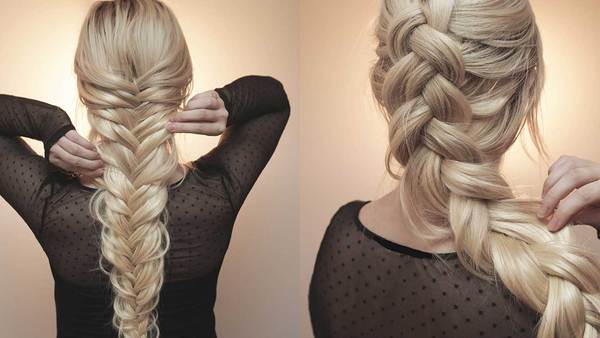
Fishtail braid
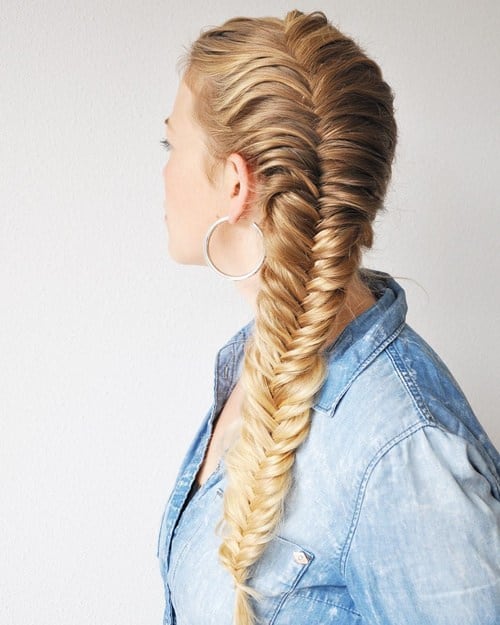
If you are looking for a braid for a fancy occasion, few can come close to the stylish outlook of the fishtail braid. Often called the most intricate of braids, it is a fan favorite. In the past few years, the fishtail braid is trending, and rightfully so.
The trick is to weave thin sections of hair together, and create a symmetrical effect looking like the aligned scales on a fish’s tail.
How to do that? Read on!
- Detangle your hair to prepare it for braiding
- Gather all the hair and then tie it into a ponytail
- Divide the ponytail into two equal sections
- Pick up a thin section of hair from the outside side of the left section, flip it over, and then add to the inner side of the right section of the ponytail
- Do the same with the other side. Pick up a thin section from the outside of the right section, and then flip it over and add to the inner side of the left section
- Repeat those two steps until you have braided the end of your hair
- Secure with a hair elastic, and then cut off the hair elastic at the top for a finished look
Waterfall braid

This is the most stunningly looking braid. There is no other way around it. For a fashionable look, the waterfall braid is the go-to option. Looking like a waterfall of hair on the side of your hair, this feminine and gorgeous look is often the go-to choice for weddings and similar events.
- Before you can start braiding, you have to brush your hair out
- Part your hair on one side, and from the side with more hair, pick up a 3-inch section of hair from the very front. Divide it into three sections
- Classify the sections like this: the closest to the top of the head is the top section, the closest to the ear is the bottom section, and the one in between is the middle section
- Make a simple 3 strand braid for one stitch
- Leave the bottom section and pick up a new section of hair next to it to flip over the middle section to create the waterfall effect
- Add more hair from the top of your head to the top section, and then flip it over the middle section
- Keep repeating until the waterfall braid reaches the back of your hair
- Do a simple braid for three or four more stitches and then pin down the braid at the back of the head. Pin it underneath the hair to hide the bobby pins
4 Strand braid
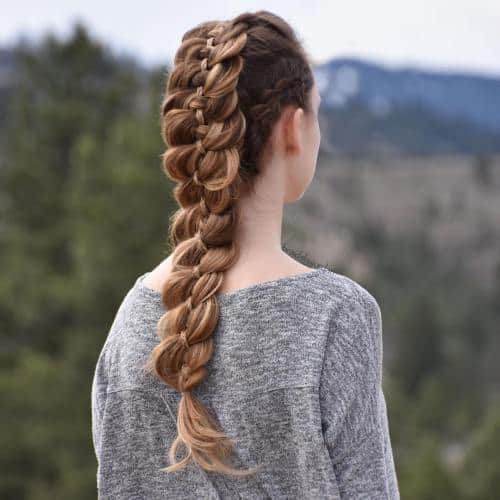
If you are tired of the simple 3 strand braid, there are types of hair braids to spice things up. One of the most common for this occasion is the 4 strand braid. It looks like a regular braid, but it is more than that.
- Part your hair down the middle or brush it all back
- Divide the hair into four equal sections, and then add numbers to them from 1 to 4
- Start braiding by flipping 1 under 2 and over 3, and then flip 4 over 3 and under 4
- Renumber the sections as 1, 2, 3, and 4 in your head, and follow the pattern as before, under-over-over-under until you have braided your hair
Rope Twisted Braid
This is one of the easiest types of hair braids you can make. Basically, you have to twist two sections of hair together. You can do this within a few minutes, and get an adorable braid for going out
- Start by preparing your hair by brushing and detangling
- Tie your hair into a high ponytail, and then divide the ponytail into two sections
- Twist the two sections individually in a clockwise pattern until you reach the very end
- Intertwine the two sections with each other in an anticlockwise direction until the end
- Secure the ends with a hair elastic