Nail art is a delightful way to express oneself, with designs ranging from intricate masterpieces to minimalist accents. While visiting a nail salon offers professional results, it’s not always practical in terms of time and expense. Fortunately, we live in an age where do-it-yourself approaches are accessible and achievable, even for those who may doubt their artistic skills.
We’ve compiled a collection of tutorials that will guide you through the process of creating elegant and fun striped nails at home. Stripes are a versatile design choice, capable of appearing playful or sophisticated and suitable for any occasion. No matter your skill level, our step-by-step guides will show you how to achieve clean, straight lines with ease, using handy tools and techniques to ensure perfect results. Embrace the simplicity and beauty of striped nail art and find out how straightforward it can be to enhance your nails on your own.
Chapter Overview
1. Easy Striped Nails Hack
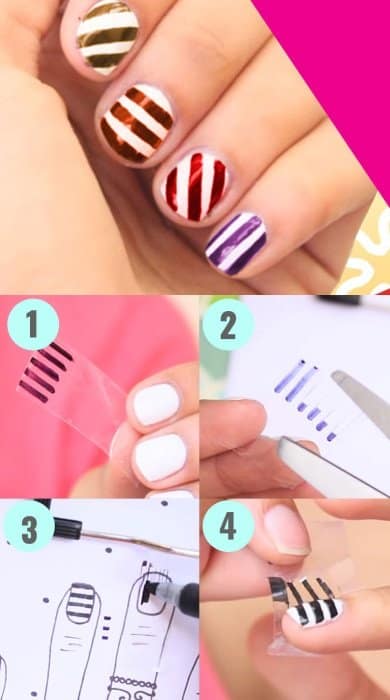
- We use adhesive tape for perfect stripes.
- Steps:
- Apply a clear coat.
- Cut tape into even strips.
- Place tape on nails.
- Paint over tape.
- Remove tape swiftly.
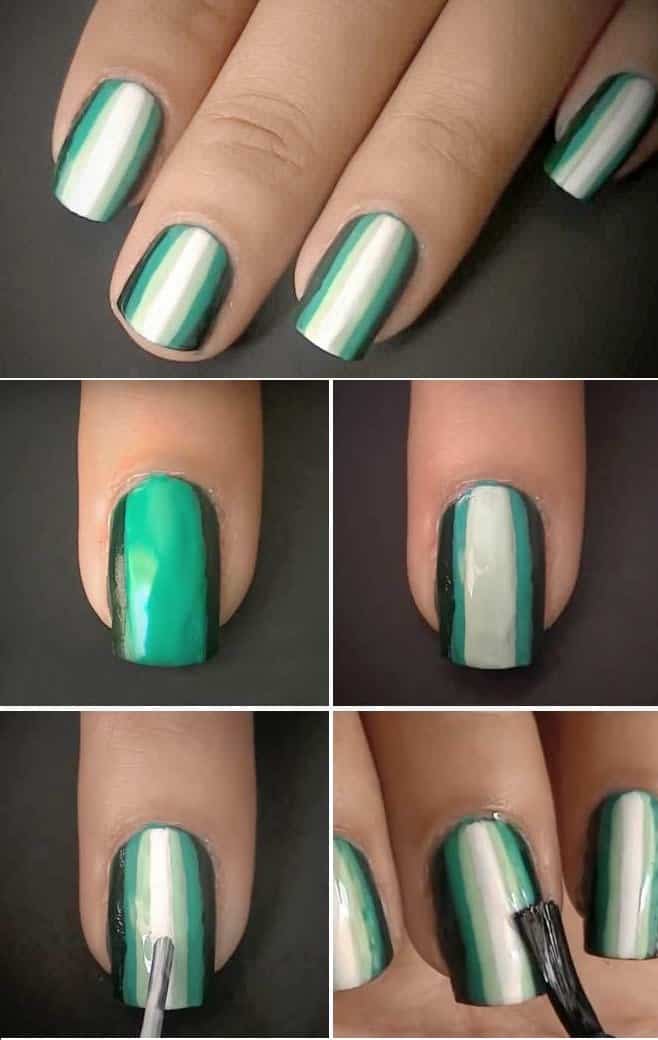
2. Tapeless Striped Nails
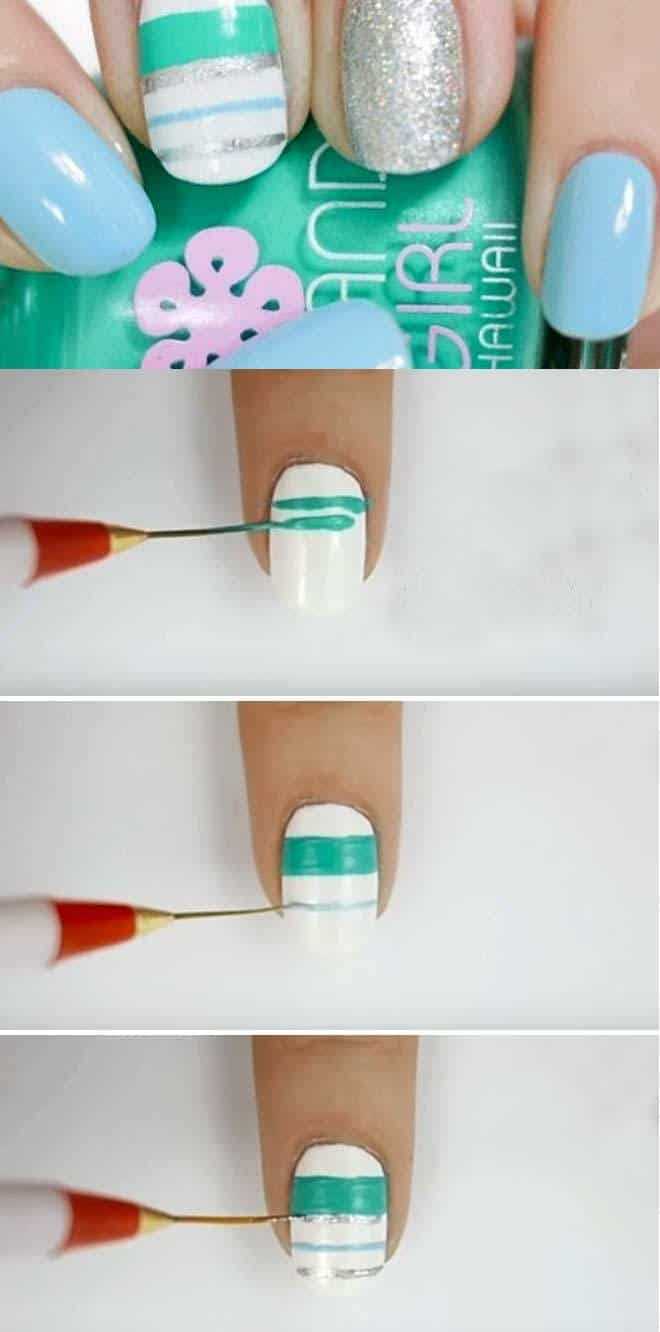
- Tools Needed: Thin brush
- Skill Level: Steady hand required
We use a teal, blue, silver, and white palette, but you’re encouraged to personalize your colors. Get creative and customize your design to match any season or occasion.
3. Stamping Plate Nails
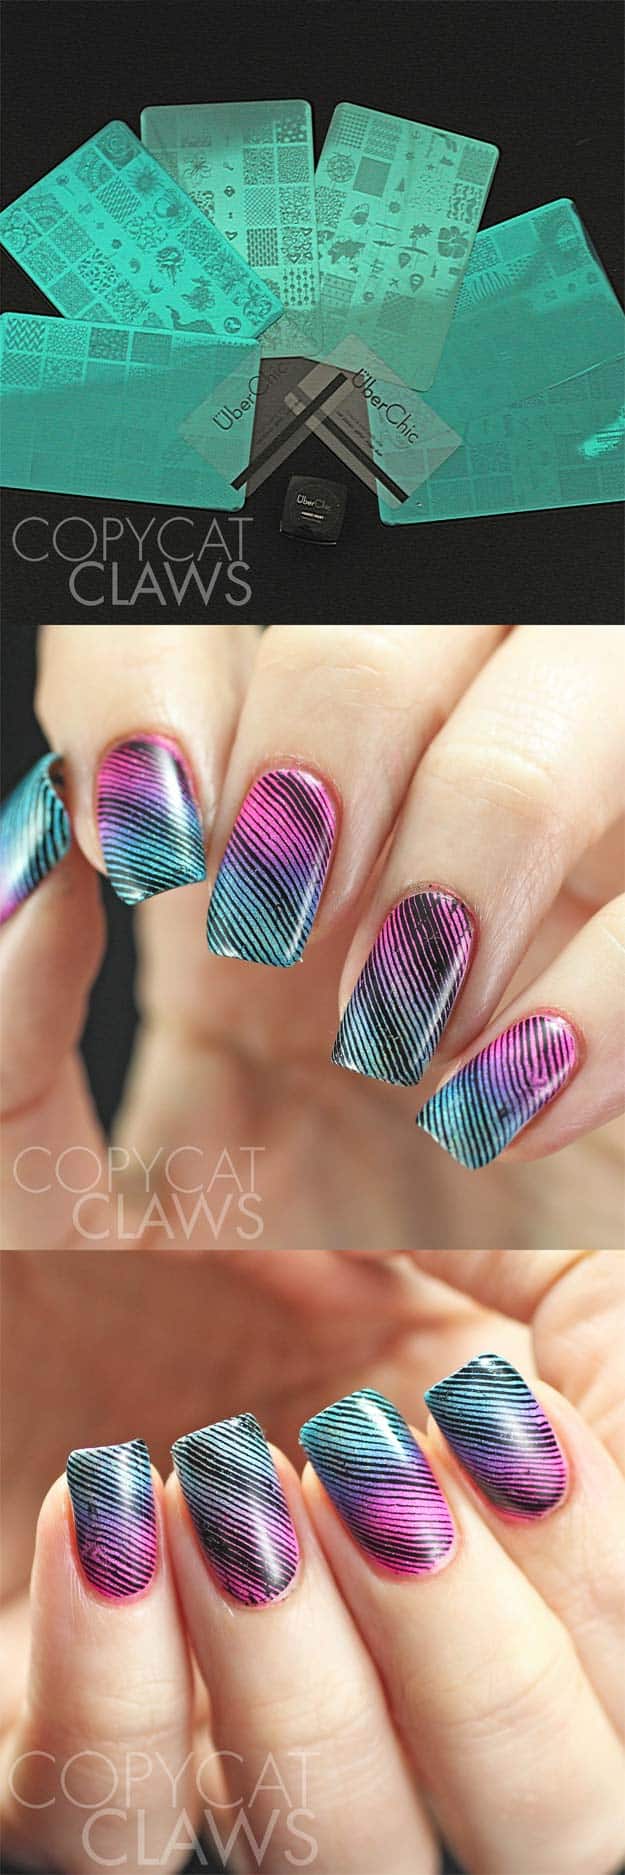
Investing in stamping plates offers us the flexibility to experiment with intricate nail designs.
- Effortless: Achieve polished looks with ease.
- Fast: Create stunning nails in minutes.
- Fun: Enjoy a new design daily.
- Versatile: Perfect for bold stripes and more.
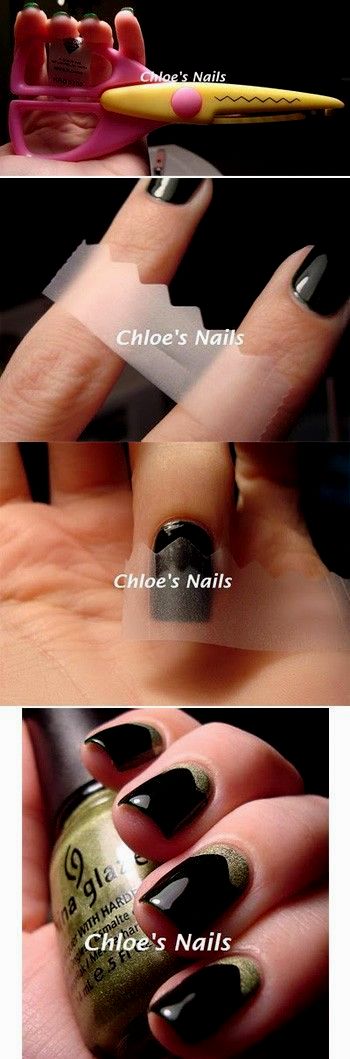
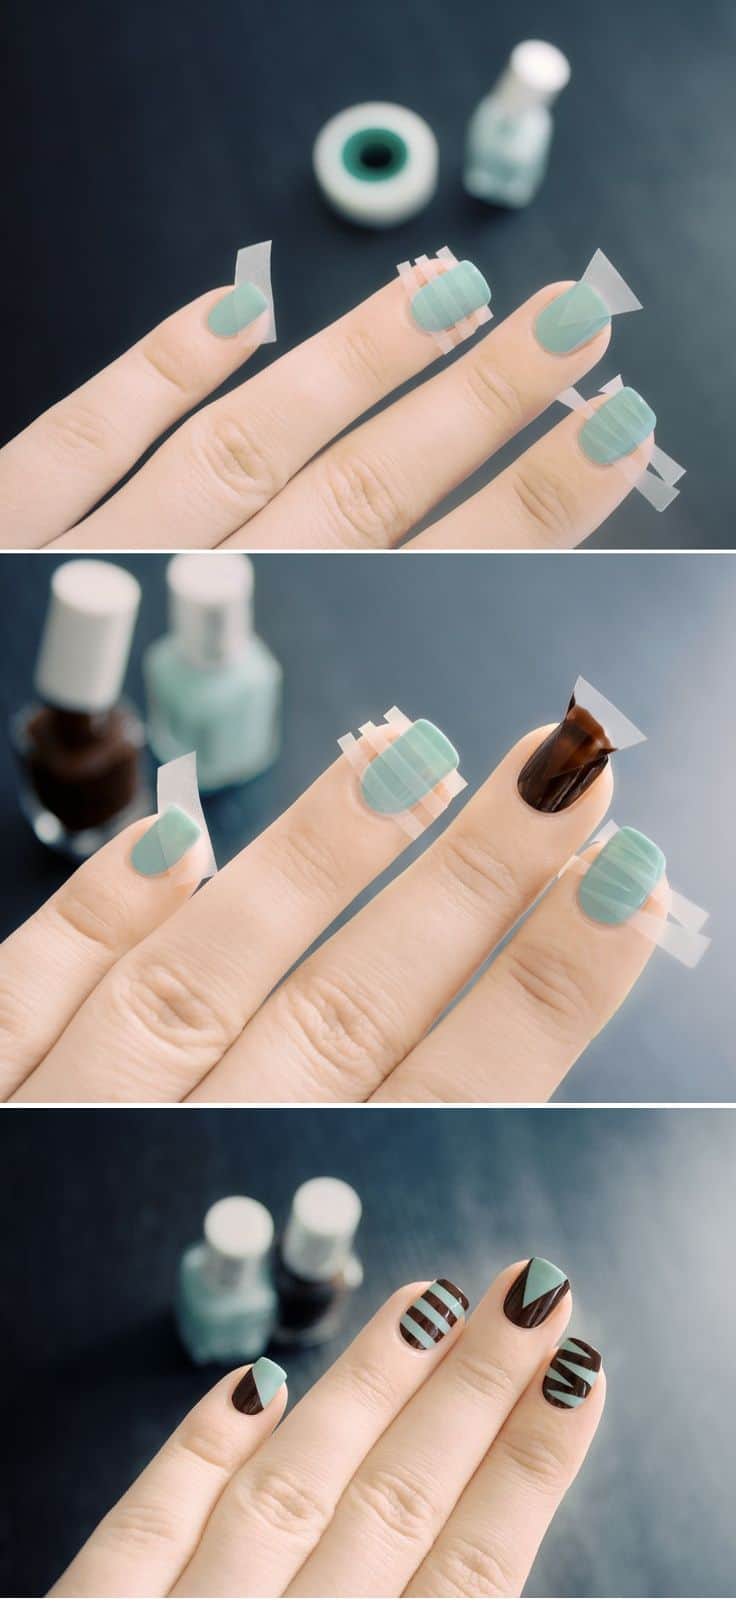
4. Negative Space
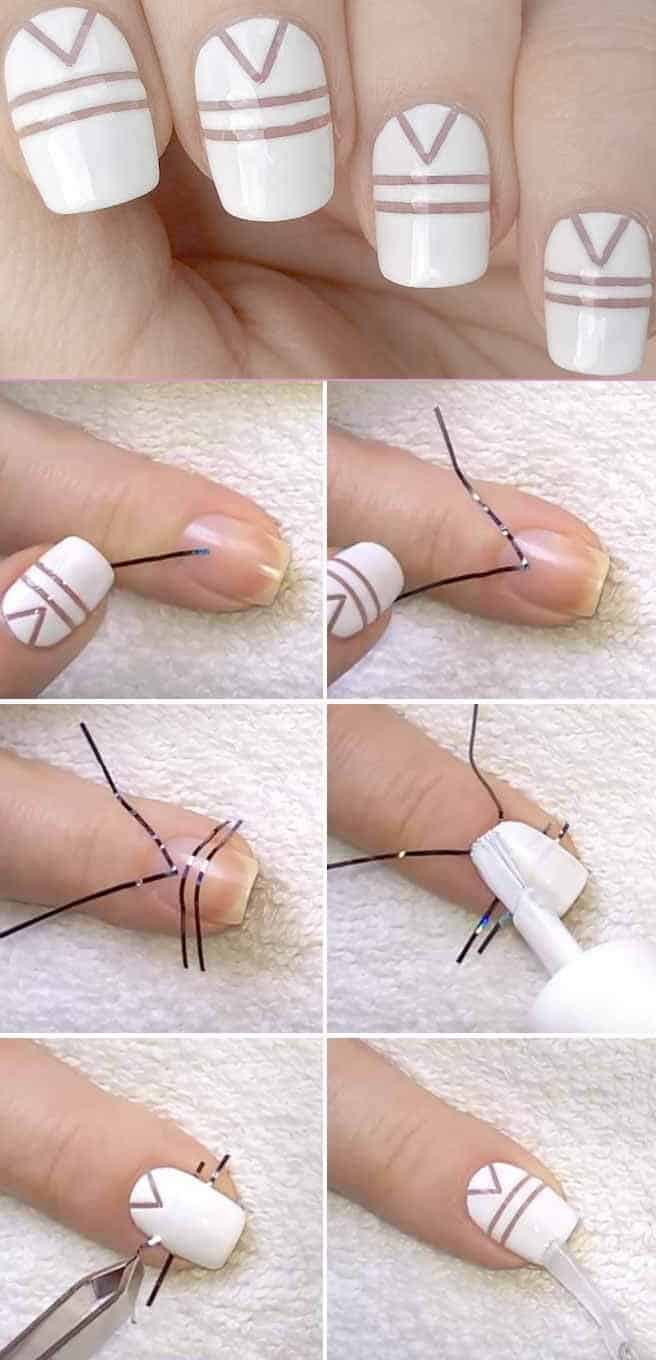
- Technique: Apply striping tapes in patterns
- Procedure: Paint over tapes, then remove
- Result: Chic negative space manicure
- Difficulty: Surprisingly straightforward
5. Quilted Nails
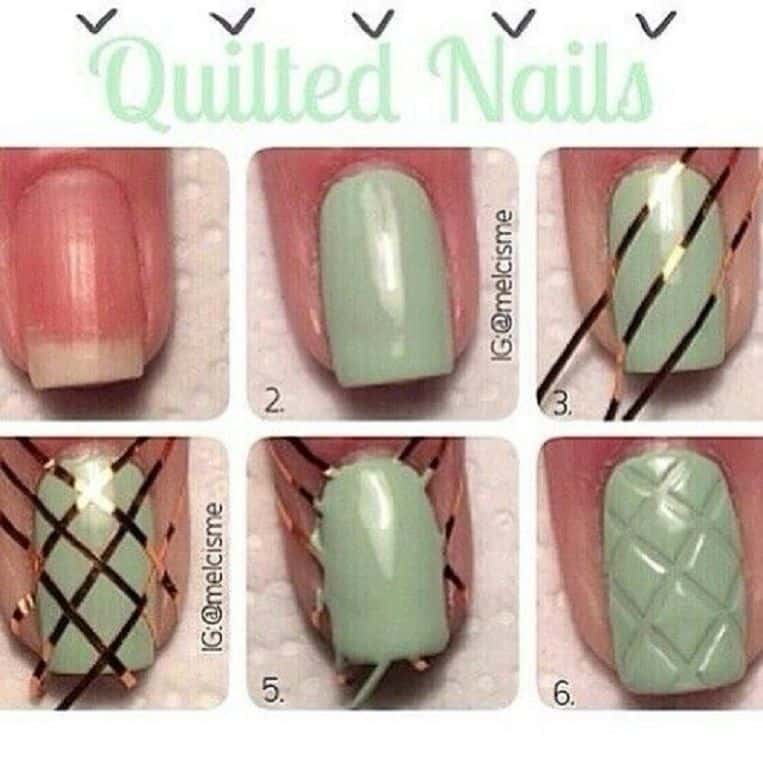
- Design: 3D-like quilted effect
- Technique: Apply striping tapes; add layers for texture
- Outcome: Stunning geometric patterns
- DIY: Achievable at home
6. Nude And Neon Nails
- Style: Nude base with vibrant neon stripes
- Design Detail: Diagonal division; neon extends to tips
- Visual Appeal: Subtle yet bold contrast color.
7. Zigzag Nails
- Fun and edgy zigzag nail pattern
- Achievable with any two colors
- Requires adhesive tape and patience
- Perfect for a unique and stylish look
8. Colorful Striped Nails
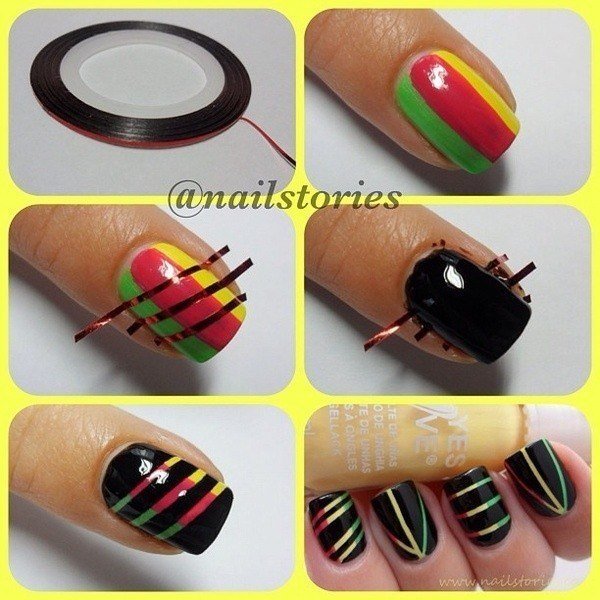
- Step 1: Paint nails with multiple color lines.
- Step 2: Use striping tape over the base colors.
- Step 3: Apply black polish then remove tape.
Result: Stunning, colorful stripes.
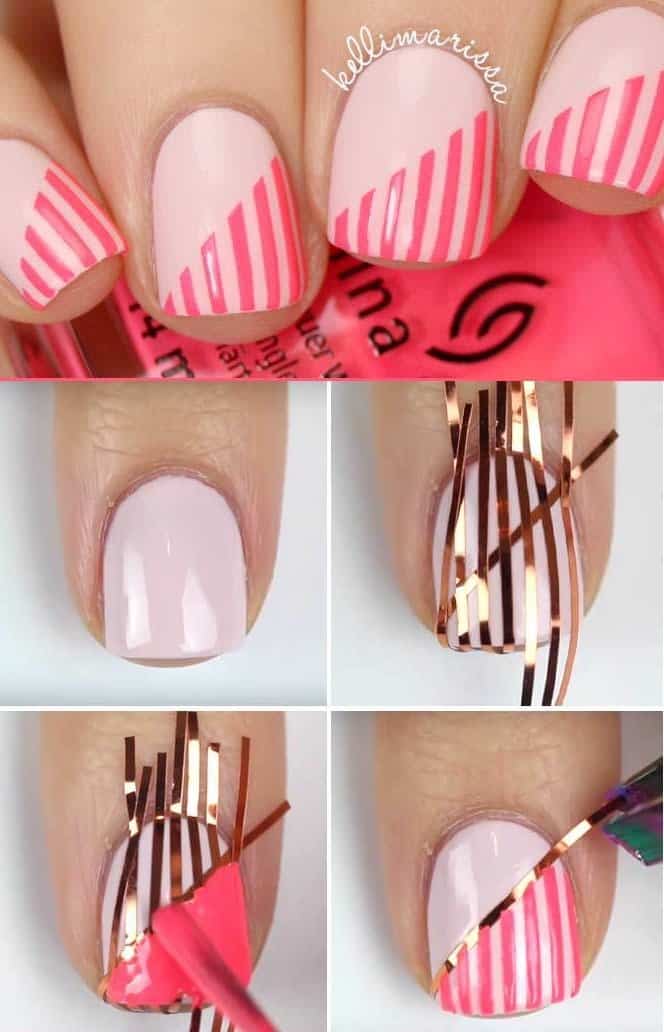
9. Flesh Toned Metallic Striped Nails
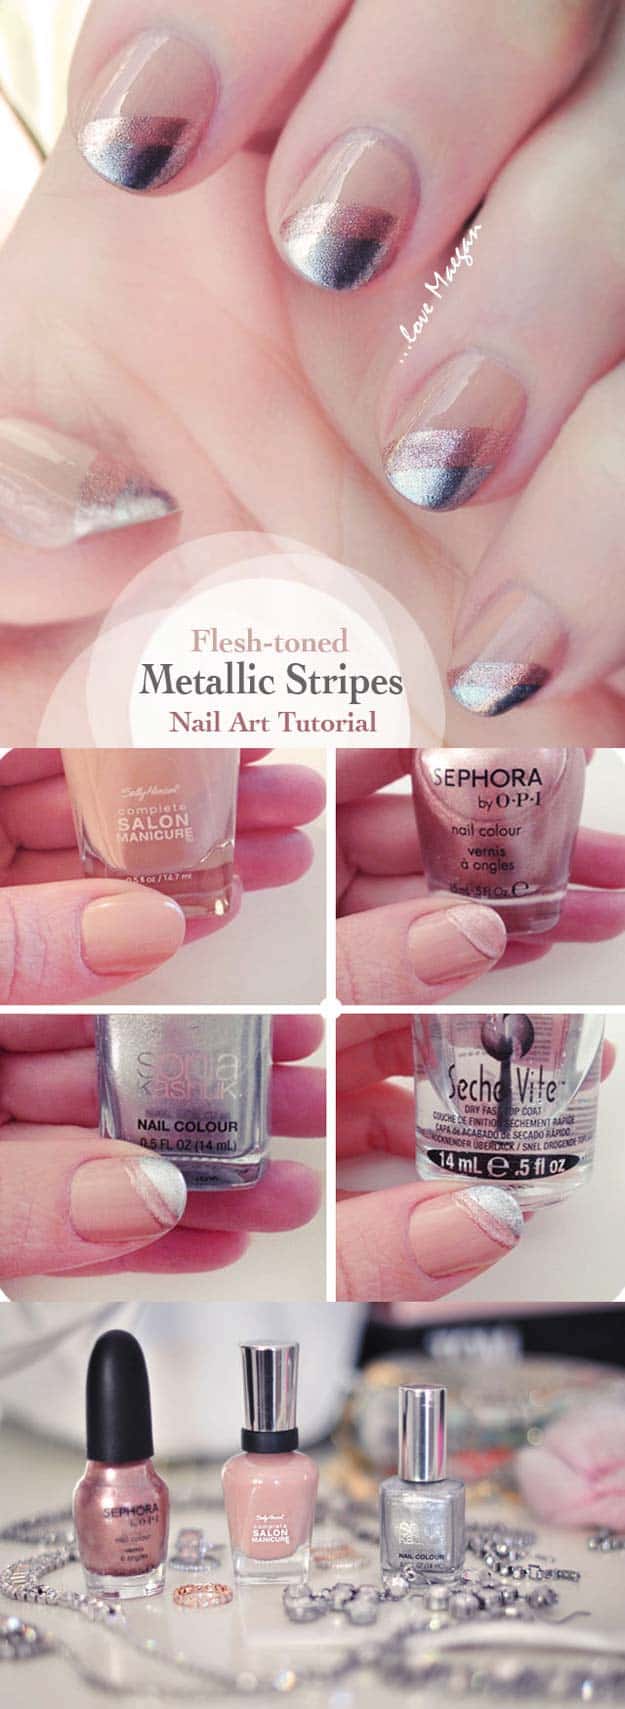
- Base: Neutral polish as the canvas.
- Stripes: Silver and gold metallic polish diagonally applied.
- Effect: Simple mani transformed to an elegant sparkle.
10. Chevron Striped Nails
- Supplies Needed: Striping tape, patience.
- Method: Arrange striping tapes into an inverted V shape.
- Next Step: Apply chosen polish.
Create captivating chevron patterns on nails with us!
11. Different Geometric Shaped Nails
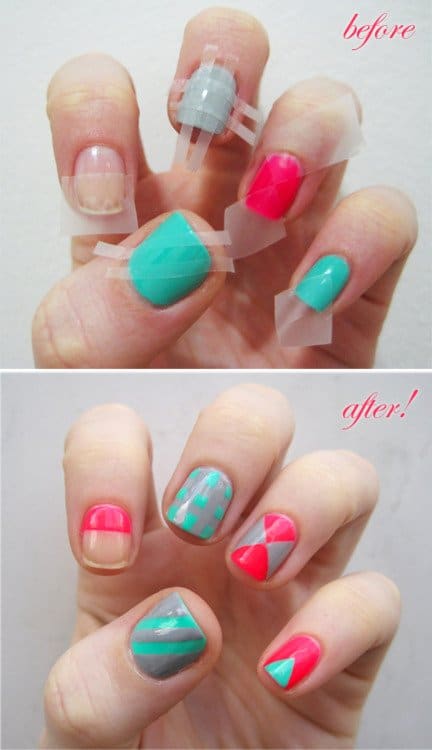
We explore a playful mix of geometric designs for nails:
- Stripes
- Triangles
- Zig-zags
With striping tape, variety is at our fingertips; each nail can flaunt a unique pattern.
12. Black And White Free Hand Striped Nails
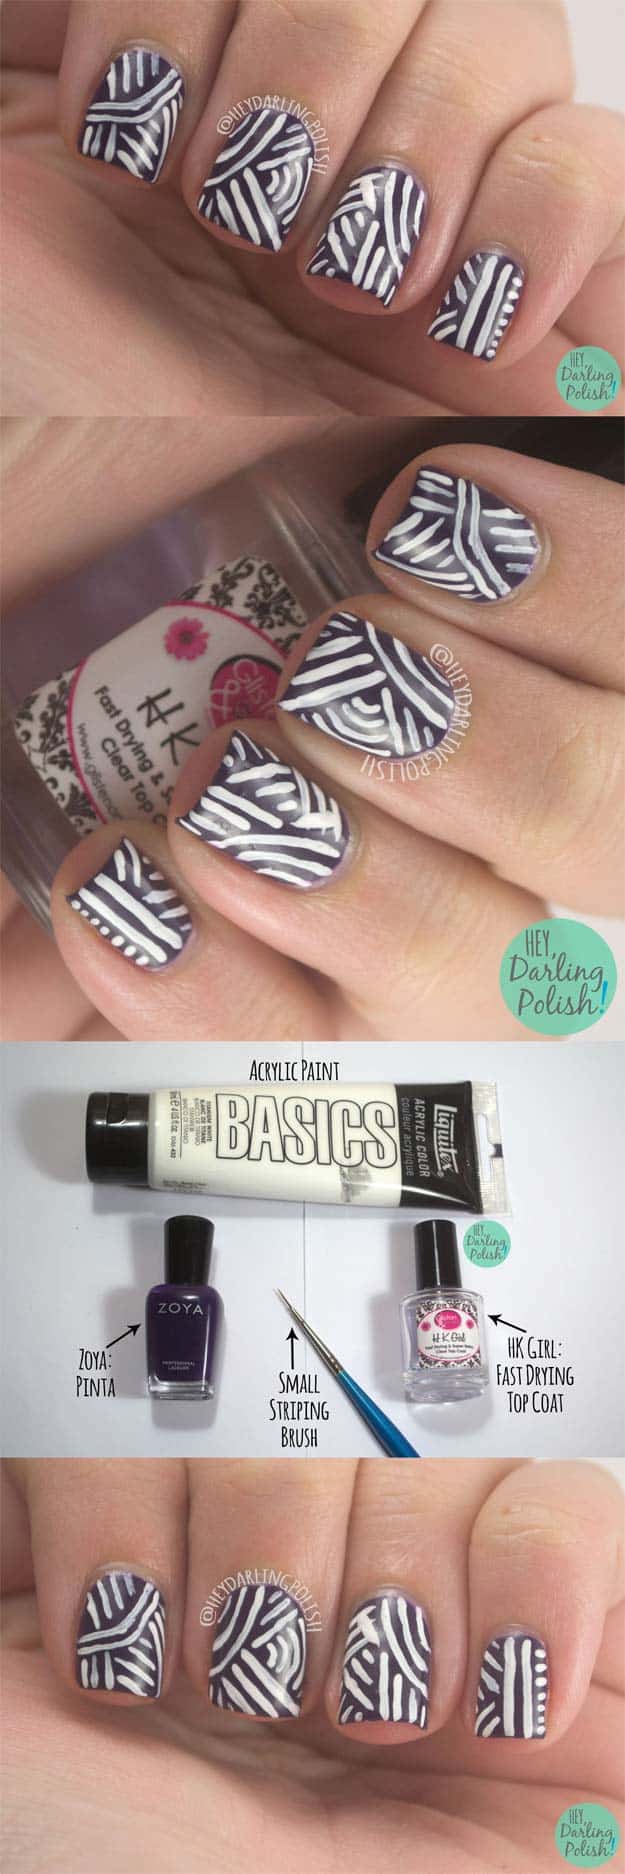
Materials Needed:
- Black Nail Polish
- White Nail Polish
- Thin Brush
Steps:
- Prep Nails: Ensure they’re clean.
- Base Color: Apply white polish; let dry.
- Stripes: Use a thin brush for black swirls.
- Dry & Seal: Allow to dry, then apply a top coat.
Experience stylish, swirly manicures with just a bit of patience.
13. Summer Mosaic Nails
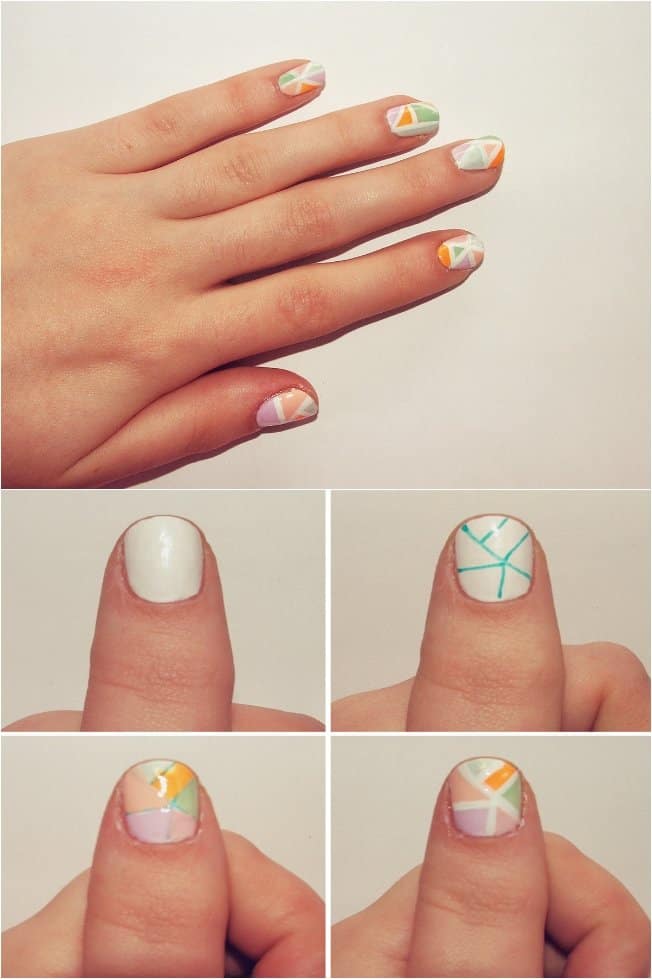
We outline our design using a pen or marker after the base coat. Then, we fill in each section with our chosen colors. To finalize, we use a thin brush to retrace the lines for a polished mosaic look.
14. Textured Triangles
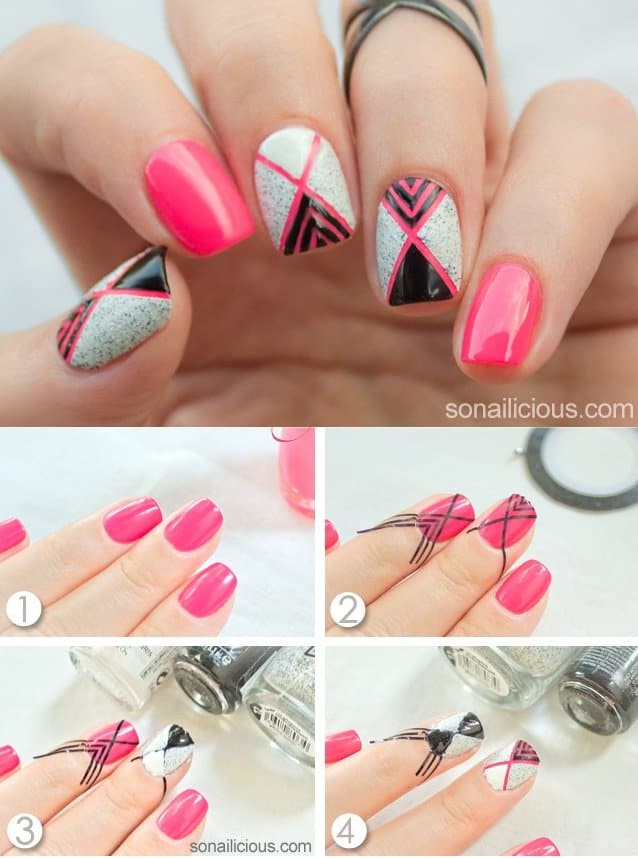
We enhance our nail art by layering textures and shapes. Here’s how:
- Utilize contrasting colors (e.g., pink and black)
- Add light textured polish for balance
- Create sharp triangles for a playful dynamic
15. Gradient Striped Nails Without Tape
Achieve perfect gradient nails by following these steps:
- Base Coat: Apply base color.
- Vertical Colors: Add vertical lines from base to tip.
- Gradient Effect: Use lighter colors for each line, decreasing width.
- Thin Line: End with a fine line down the center.
16. Fun Striped Nails
We present a playful, geometric stripe design easily achieved with adhesive tape. Follow these steps:
- Cut tape into strips, diagonals, V-shapes, or zigzags.
- Apply two different tones per nail for a subtle look.
- For a bolder statement, opt for multiple colors across your fingers.
Experiment and have fun with the endless combinations!