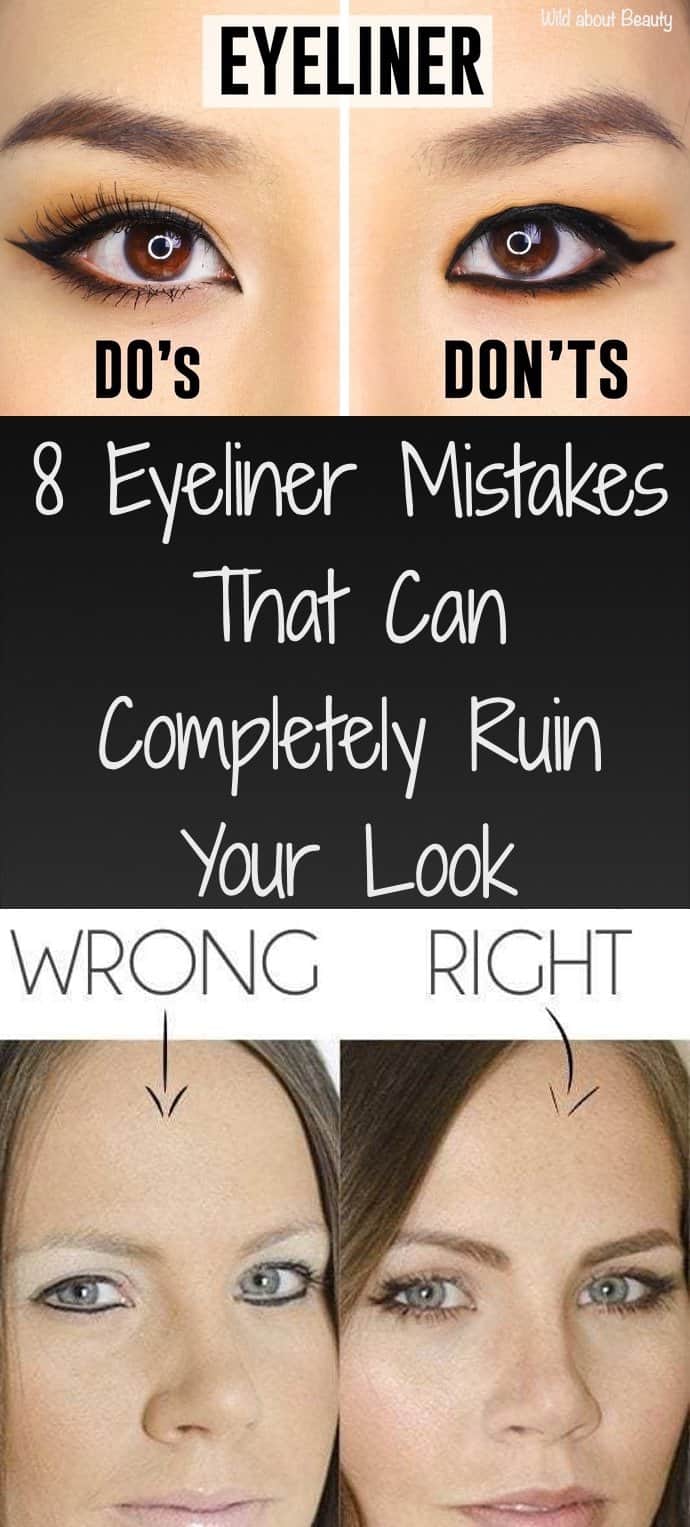
We’ve all experienced the transformative power of eyeliner, a staple in our makeup arsenal designed to accentuate the eyes—arguably the most captivating feature of the face. When applied with skill, eyeliner can elevate a look, drawing praise and attention. However, a slight error in application can lead to less-than-desirable results, turning a potentially stunning eye makeup into an inadvertent mishap.
Recognizing the difference between a novice stroke and a makeup artist’s master touch is crucial. Renowned beauty experts, including celebrity makeup artists like Carl Ray—who worked with Michelle Obama—and Glamsquad’s Kelli Bartlett, emphasize the significance of technique and product selection. Whether shopping at Sephora, Ulta, or Target, choosing the right type of eyeliner—from the sharp precision of felt tip liners to the versatility of gel formulas—is a critical first step. Leveraging their insights, we aim to help you navigate common eyeliner pitfalls and to craft that perfect eyeliner look with confidence.
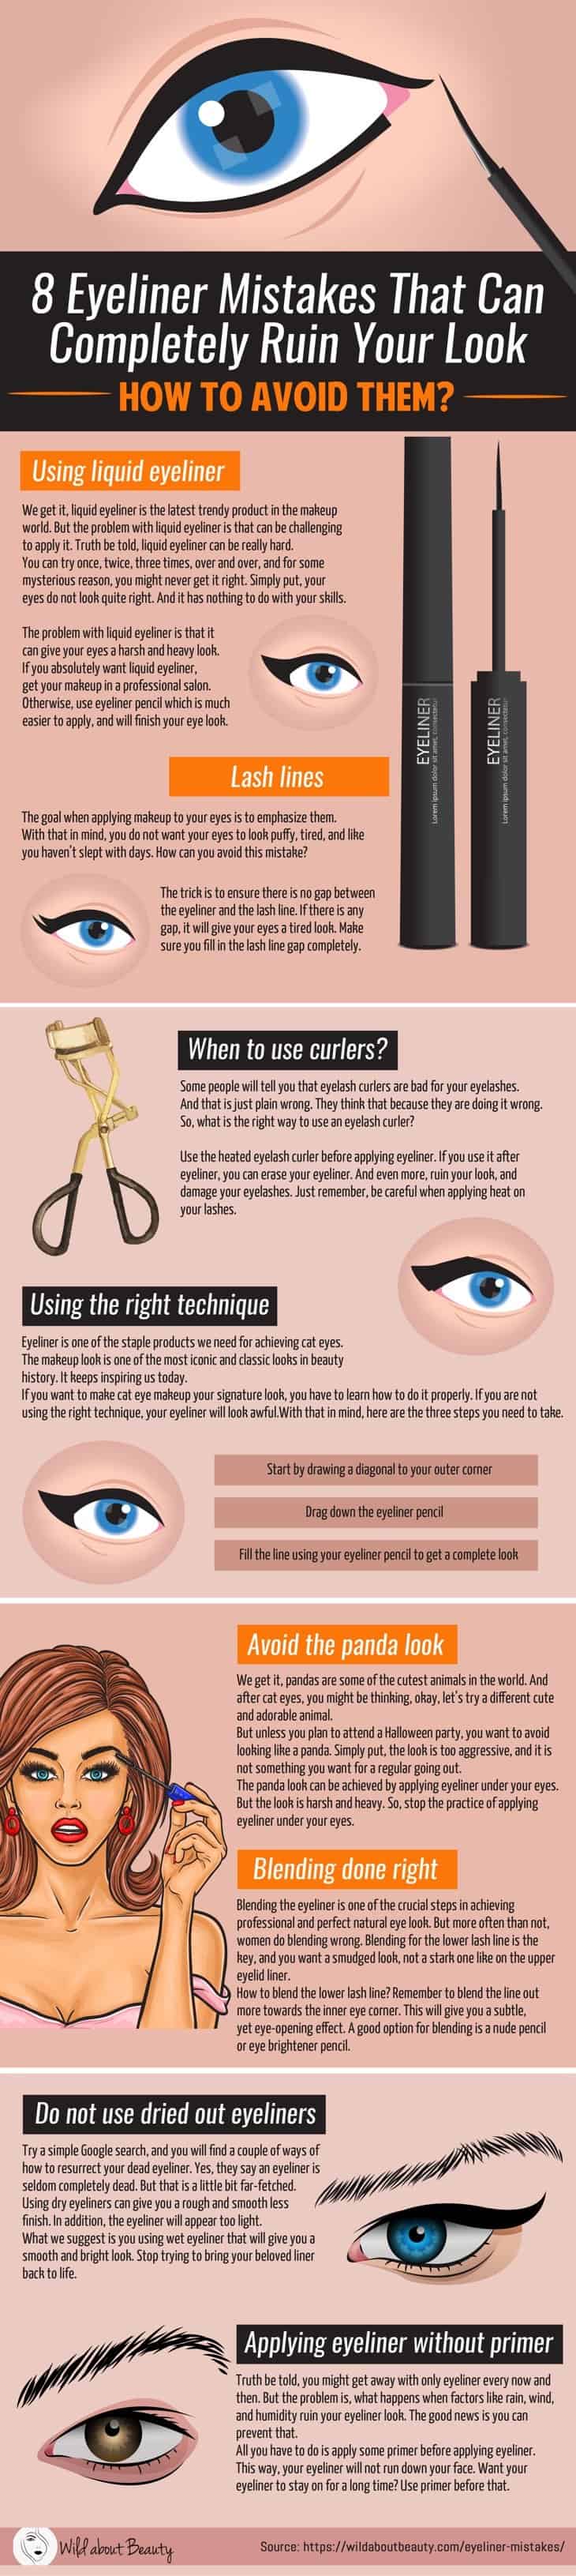
Chapter Overview
Using Liquid Eyeliner
Preparation: First, ensure the skin around your eyes is clean and apply a primer for a smooth base. Then, have your liquid liner ready – we prefer a black liner for its classic appeal.
Application Steps:
- Gel vs Liquid: We often choose liquid eyeliner over gel for its precision.
- Technique: Start by drawing small dots or dashes along the lash line. Then, connect them smoothly.
- Steadiness: Keep your hand steady. Resting your elbow on a flat surface may help.
- Thickness: For a subtle look, go for a thin line. Increase thickness gradually as needed.
Mistakes Correction:
- If you make an error, a small cotton swab dipped in makeup remover can clean up without much fuss.
Practice: Remember, perfecting the art of the liquid liner requires patience and practice.
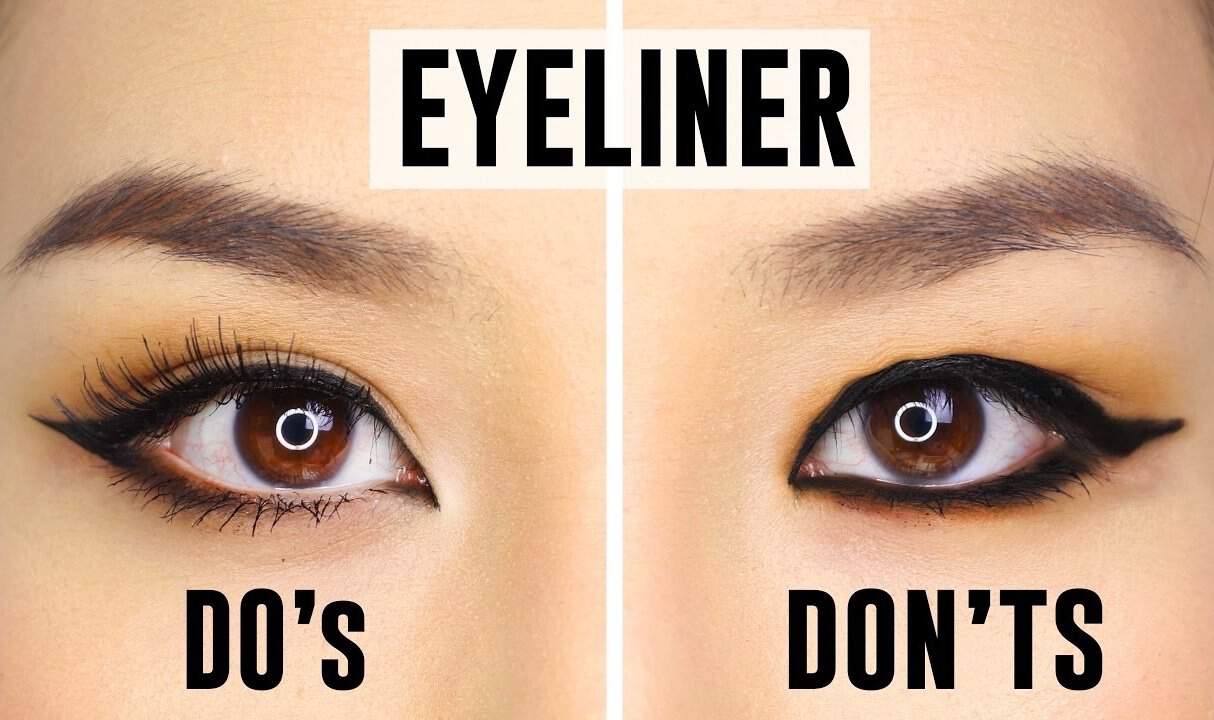
Lash Lines
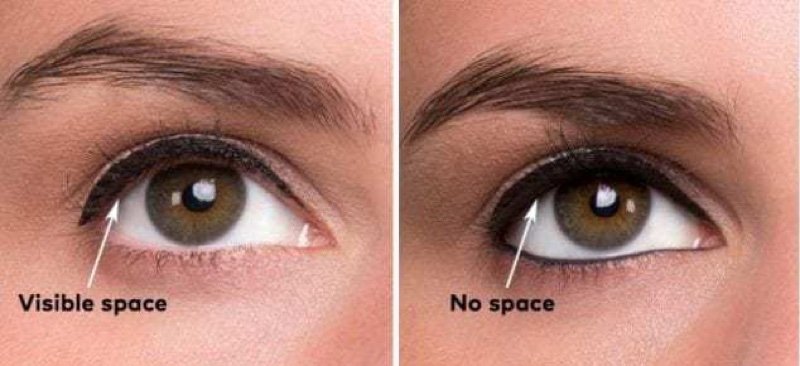
To enhance our eyes, we focus on the lash line, where precision is key. It’s crucial to apply eyeliner close to the top lashes without gaps, for a seamless look. For the waterline, a thin pencil creates definition without overwhelming the lower lash line. On the lower lid, a light touch adds depth, contrasting with the bottom lid, which should remain minimal to avoid a puffy appearance.
When To Use Curlers?
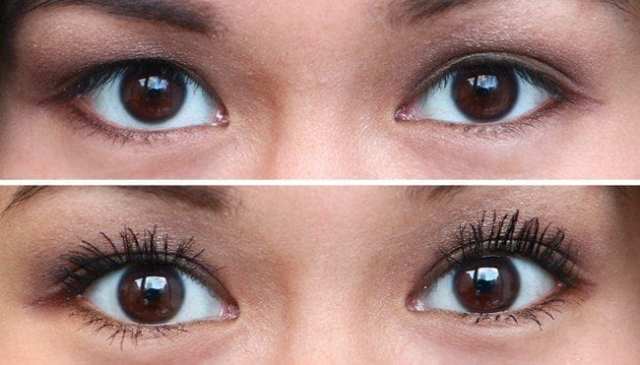
- Prior to makeup: Always curl lashes before applying eyeliner to avoid smudging and potential damage to lashes.
- Heat precaution: Use a heated eyelash curler with care to prevent overheating your delicate lashes.
Remember, we maintain lash health and achieve the best results by following these simple timing guidelines.
Using The Right Technique
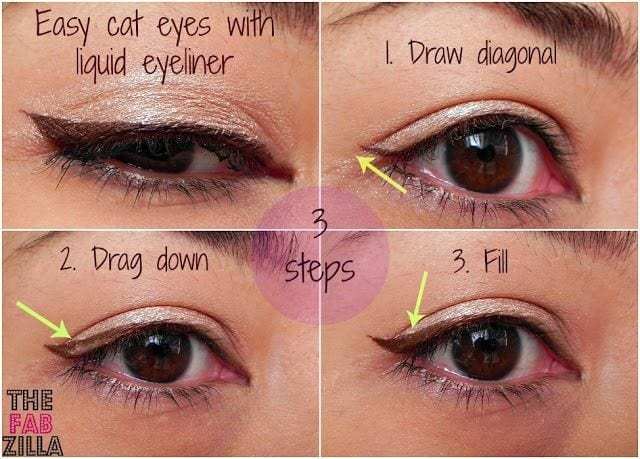
Achieving the perfect cat-eye requires precision and the right technique. We ensure control by holding the skin of the eyelid taut, which helps in drawing a smooth, even line.
- Step 1: Begin with the outer corners, drawing a flick upwards as the foundation for the cat-eye.
- Step 2: Position the pencil liner on the outer corner and pull it down to meet the lash line, creating the initial outline.
- Step 3: We fill in any gaps by using the eye pencil over our outline to solidify the cat-eye shape.
For those with hooded eyes, the approach differs slightly:
- Aim to draw the liner brush where the crease of our hooded eyes falls and smooth the line out to ensure it’s visible with eyes open.
- We focus on the inner corner with a thinner stroke to avoid making the eyes look smaller.
Lastly, we practice to gain finesolicit mastery; a pencil liner is a powerful tool with which we harness our desired eye shape.
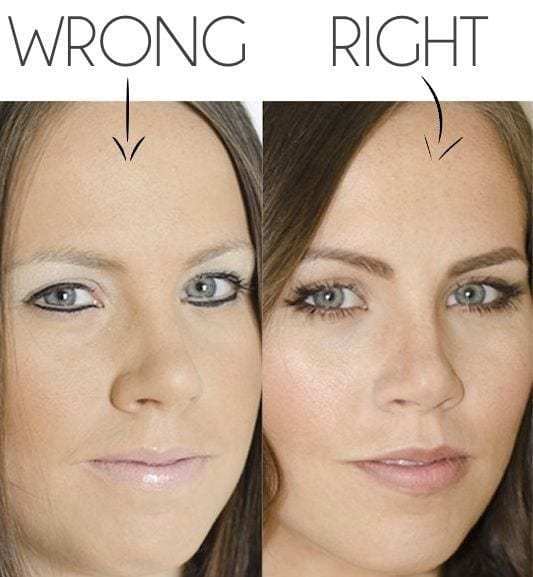
Avoid The Panda Look

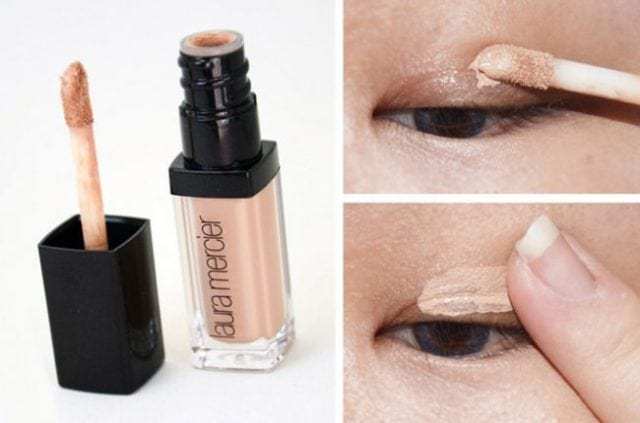
- Waterproof Products: Choose waterproof concealers to prevent smudging.
- Application Techniques: Apply with precision to avoid dark circles from resembling raccoon eyes.
- Prevent Smearing: Set under-eye concealer to reduce transfer onto other areas.
- Target Wrinkles: Use products designed to minimize the appearance of wrinkles without caking.
By adhering to these guidelines, we maintain a polished look without the unwanted “panda” effect.
Blending Done Right
When applying eyeshadow, choosing the right colors is crucial. Stick to hues that complement your skin tone, including taupes, soft browns, and grays. Avoid stark contrasts, particularly for a smoky eye look.
- Black may seem like a go-to color, but it can be too harsh if not blended properly.
- Use a smudge brush for the lower lash line to create a softly diffused edge, suggesting a natural shadow rather than a hard line.
- Opt for nude or eye brightener pencils to blend seamlessly into your skin for a subtle enhancement.
Remember, a well-blended shadow can elevate your eye makeup to professional levels without appearing overdone.
Do Not Use Dried-out Eyeliners
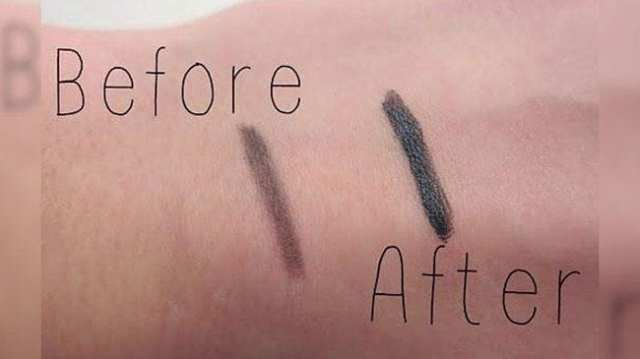
- Long-wear: Waterproof formulas promise staying power, but when dry, fail to deliver.
- Consistency: Fresh liners ensure a smooth, even application.
| Eyeliners | Status | Outcome |
|---|---|---|
| Fresh | Ideal | Crisp, defined lines |
| Dried Out | Avoid | Uneven, faint marks |
- Sharpener Use: Regularly sharpen waterproof eyeliner to maintain ease of application.
- Appearance: A hydrated eyeliner offers a vivid and polished finish, whereas a dried one lacks intensity.
Applying Eyeliner Without Primer
- Prepare your lids: Ensure they are clean and free from oils.
- Apply Eyeliner: Use a durable, waterproof formula.
- Set with Powder: Gently dab a matching eyeshadow over it to set.
- Fix Mistakes: Use a cotton swab dipped in makeup remover for precision.